
This is a continuation from my previous article that gets CP/M booting on the CFFA 3000 and PCPI Applicard. The goal of this article is to load NZ-COM on top of CP/M, install ZSDOS as a BDOS replacement within NZ-COM, then install clock card support for NZ-COM (clock card support requires ZSDOS).
What is NZ-COM?
NZ-COM is a powerful overlay for CP/M that replaces CP/M’s Console Command Processor. It provides many benefits that make CP/M much easier to use, including the ability to dynamically load new CP/M components like CCPs and BDOS’s. It also adds many new CP/M commands. The NZ-COM manual describes all of the features and is a good read.
What is ZSDOS?
ZSDOS is a Basic Disk Operating System (BDOS) replacement for CP/M or NZ-COM. It has many benefits of its own over the standard BDOS, but the main benefit we are interested in is the ability to support clock cards. I’ve included the complete ZSDOS manual within the .zip file for this article that describes all of the ZSDOS features.
Ok, if you are ready to supercharge your CP/M system, here we go!
Preparing to Install NZ-COM
- First, make a backup of your CFFA flash card.
- Download the PCPI-NZCOM-CFFA3000.zip file that contains all of the needed disk images.
- Copy the contents of Appli-Card boot disk to A0:
- From the CPMHD_CPM .dsk image, use PIP to copy QUIT.COM and PDOSXFER.COM to the A: hard drive: ‘PIP A:=E:QUIT.COM’, ‘PIP A:=E:PDOSXFER.COM’
- Copy contents of Apple_CPM disk to A0: (These are just a few extra utilities that are nice to have).
- ‘PIP A:=E:*.*’
- One of the nice-to-have apps is NSWEEP. We will switch to NSWEEP for future copying as it’s much easier to use for multiple file copies to different user directory locations.
- Copy the disk images nzcom_disk1.img, nzcom_disk2.img, etc. over to HD A0: drive like you did in Step 5.
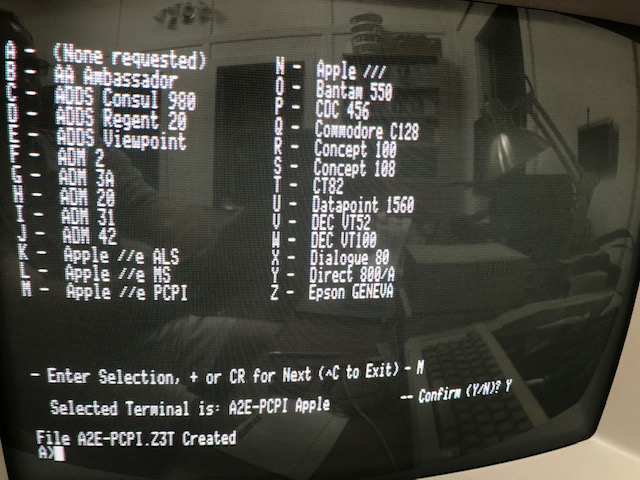
- We need to set a default terminal preference for NZ-COM. Make sure you are on the A: drive and type ‘TCSELECT’
- Select ‘M’ for Apple //e PCPI and you should see “A2E-PCPI.Z3T” created.
- Copy your terminal file to the default myterm.z3t name: ‘PIP A:MYTERM.Z3T=A2E-PCPI.Z3T’.
- Set the default ZFILER app: ‘PIP A:ZFILER.COM=ZF-REV.COM’
- Type ‘MKZCM’ and select ‘S’ to save with defaults. We will tweak later.
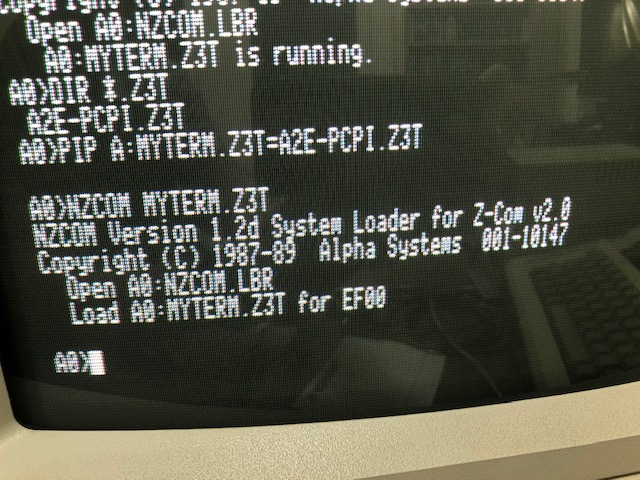
Setting terminal defaults for NZ-COM - Type ‘NZCOM’ to start it up. Ignore the “STARTZCM?” message for now.
- If you need to exit back to pure CP/M, type ‘NZCPM’.
- Set your default terminal: ‘NZCOM MYTERM.Z3T’.
Applying your terminal settings file to NZ-COM - Now we will create the STARTZCM alias to automatically load your default terminal file:
- ‘SALIAS STARTZCM’
- Notes on SALIAS: Ctrl-J displays help, Ctrl-K then Ctrl-X saves and exits.
Using SALIAS to automatically load the default terminal file when NZ-COM starts.
- Try out a new app like ZFILER now – So much nicer than PIP!
Naming User Spaces and Directories
One of the nice features of NZ-COM over CP/M is the ability to label directories and user spaces. We will create one for A0: but you can create as many as you like up to user 15.
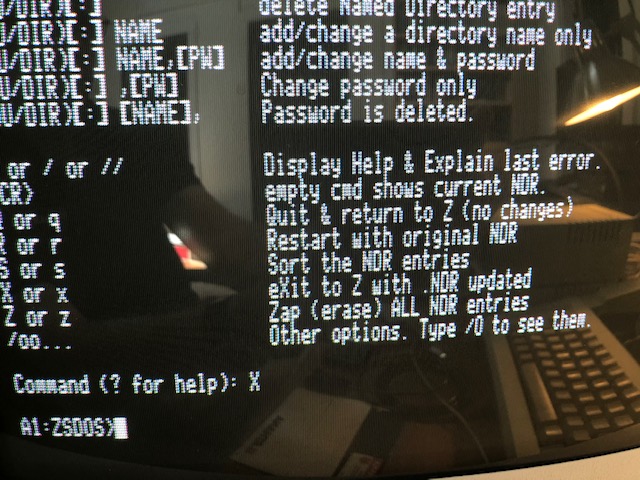
- Type ‘EDITNDR’
- Pressing <ret> will list all currently name directories (should be none for now).
- Type ‘A0:BOOT’ <ret>
- Pressing <ret> again will show that you have name A0: as BOOT.
- ‘X’ will save and exit (sort of save).
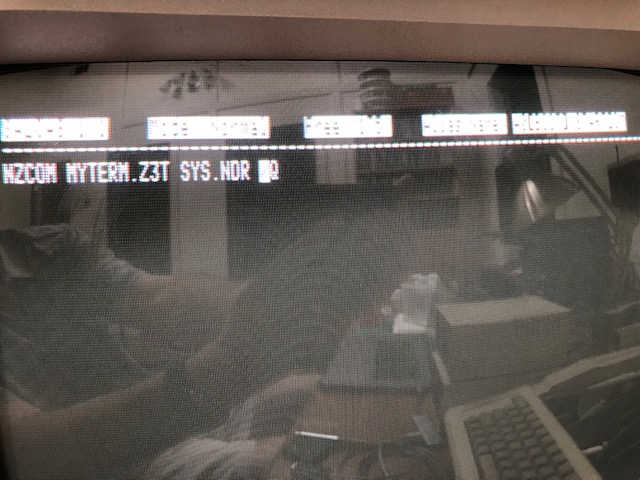
- Type ‘SAVENDR SYS’
- Type ‘SALIAS STARTZCM’ and add SYS.NDR to the first line.
Using SALIAS to automatically load the default terminal file when NZ-COM starts. - Remember that Ctrls E, S, D, X move the cursor around.
- Press ESC to show the menu, ‘S’ to save, then ‘X’ to exit SALIAS.
- EASE.COM – like a DOS shell which keeps history
- CTRL-E cycles through previous commands
- CTRL-X cycles forward through commands
- CTRL’s S and D move the cursor left and right on the command.
- Typing ‘H’ shows all memory-resident commands
Adding ZSDOS and Date/Time Support for a Time Card
We have NZ-COM up and running and for many people, this is enough. You can do a lot with NZ-COM. But if you want to push the CP/M envelope a little bit further, then continue on with me and next, we will add the BDOS replacement ZSDOS to NZ-COM so that we can install clock support.
Copy ZSDOS files to CP/M partition
- Before starting the ZSDOS installation, now is a good time to make a backup of your CF card. Do that now.
- Let’s create a separate user area to hold all of the ZSDOS software, A1:
- Type ‘EDITNDR’
- At the EDITNDR command prompt, type ‘A1:ZSDOS’ and press <ret>.
- ‘X’ to exit.
- Type ‘SAVENDR SYS’ to save the new directory settings, then verify you have a new directory by typing ‘A1:’. You should see the following A1:ZSDOS prompt.
User A1 designated as the ZSDOS area.
- Transfer the three disks worth of ZSDOS software (zsdos_disk1.dsk, zsdos_disk2, etc.) to your CP/M environment (I use ADTPro to transfer each disk image to a scratch floppy that I re-use).
- Boot to NZ-COM, change to A1: location (type ‘A1:’), and then type ‘NSWEEP’.
- Type ‘L’ to log a new drive and select ‘E’ for your S6,D1 drive (assuming you’ve configured CP/M from the previous article).
- Press ‘T’ to tag all of the files on the floppy, them ‘M’ to mass copy. Type ‘A1:’ as the destination (make sure A1 is the destination and not A0 or all of your files will end up on the root A0 directory).
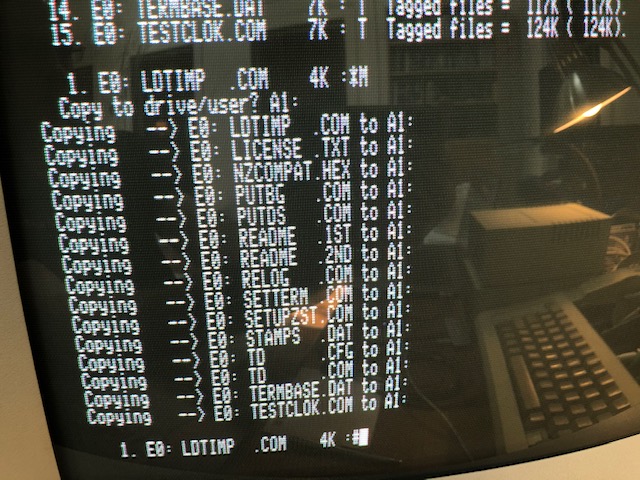
Using NSWEEP to mass copy files from floppy drive E0: to A1: - ‘X’ exits NSWEEP.
- Repeat for next two zsdos disks.
Installing ZSDOS
- Use NSWEEP to copy MLOAD.COM, COPY.UPD, COPY.CFG and COPY.COM to A0:.
- Switch to A0:
- We will use ZSDOS’s better COPY utility over PIP. Make a backup of NZCOM.COM AND NZCOM.LBR:
- ‘COPY NZCOM.COM NZCOM.BAK’
- COPY NZCOM.LBR NZCOM.LBK
- Move some files over to A0:
- ‘COPY A1:ZSDOS.ZRL A0:NZZRL’. <–Make sure you rename the destination file.
- ‘COPY A1:MLOAD.COM A0:MLOAD.COM’
- Patch NZCOM.COM for ZSDOS: ‘MLOAD NZCOM.COM,A1:NZCOMPAT.HEX
- Increase the User’s Memory Area to 7 records (You will lose some effective TPA doing this):
- ‘MKZCM NZCOM’
- Set User’s Memory Area to 7 records, then (S)ave.
- Replace the default NZCOM start files in the NZCOM.LBR archive file with the newly created ones:
- ‘LPUT NZCOM NZCOM.ZCM’
- ‘LPUT NZCOM NZCOM.ENV’
- ‘LPUT NZCOM NZDOS.ZRL’
- Clean-up:
- ‘ERA NZCOM.ZCM’
- ‘ERA NZCOM.ENV’
- ‘ERA NZDOS.ZRL’
- Type ‘NZCPM’ to go back into basic CP/M then ‘NZCOM’ to relaunch NZ-COM and ZSDOS should be installed and functional now.
Installing clock card support for NZ-COM/ZSDOS
- Before starting this section, make sure you loaded your CP/M clock driver when you first installed CP/M onto your hard drive. In my previous article, I installed the TimeMaster clock driver.
- Make sure you are in A1:
- We are going to install clock support for the TimeMaster H.O. clock card, but if you have another clock card you want to add support for, you can try out different clock drivers with the ‘TESTCLOK’ program. TESTCLOK lets you select one of the available clock drivers from the CLOCKS.DAT file. If the driver works, you will see the time and date displayed at the bottom of the screen. For a list of all supported NZ-COM clock drivers, see page 131 of the ZSDOS Manual.txt file, included in the .zip file with this article.
- Type ‘SETUPZST’
- Select ‘1’ – Generate New Time Stamp Program’
- Then ‘1’ – DateStamper ™
- Load as an RSX below the CCP? (Y[N]) : ‘N’
Install in NZ-COM User Space? (Y[N]) : ‘Y’
Location of STAMPS.DAT file [A1:] : [RET]
Extract Clock from Library ([Y]/N) : ‘Y’ - Select the clock card for your system. For a TimeMaster/PCPI/A2E setup, select ‘5’ AP2-CDZ180 and press <Ret> twice. I bet you didn’t think it would be that driver! This is the only driver from the list that will work for the PCPI and TimeMaster.
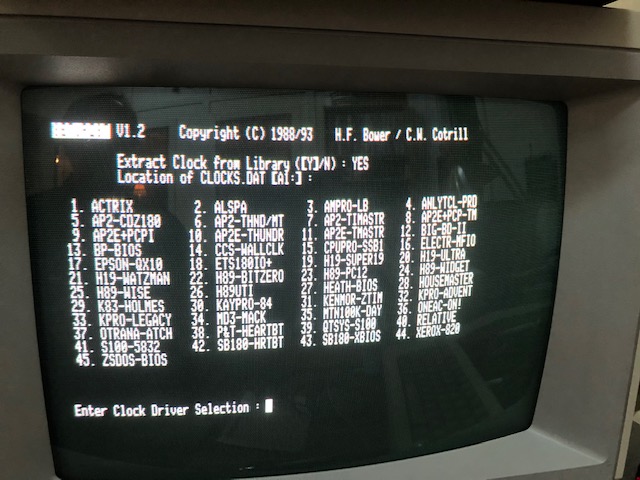
All of the available clock drivers shown in SETUPZST - The app will now generate the LDTIM.COM file, which is the file you execute to load the clock driver into memory. After exiting the app, type “LDTIM’ and you should see a successful loading message.
- Next type ‘LSH’ and you should see the correct time displayed at the prompt.
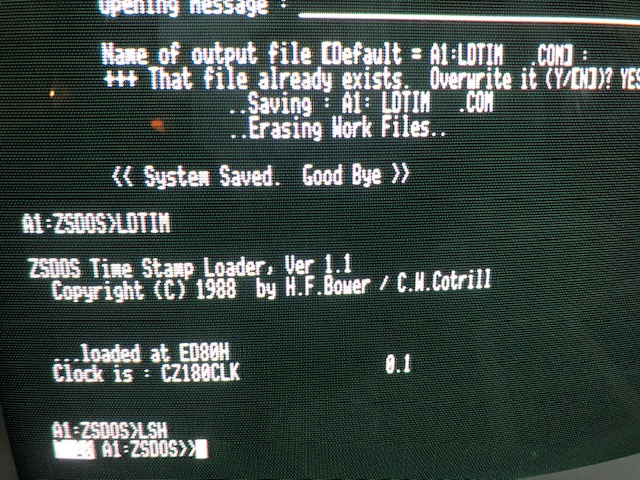
Successfully loading the AP2-CDZ180 clock driver with LDTIM, followed by LSH showing the time on the command line. - Woo! You now have clock support installed!
- To initialize date stamping on your hard drives (assumes you setup two hard drives A and B from the previous article, type ‘PUTDS -D=A’ for drive A and ‘PUTDS -D=B’ for drive B.
- You can do this for floppy drives, too. Just replace the drive letter you want to date stamp. PUTDS copies a !TIME_DAT file onto the disk to keep track of dates and modify times.
- ZXD is a ZSDOS directory app that supports time/date. You can copy it to the A0 location, then type ‘ZXD’ to do a directory and you should see the date/time at the top. If you’ve modified a file, you will see the modified time to the right of the file.
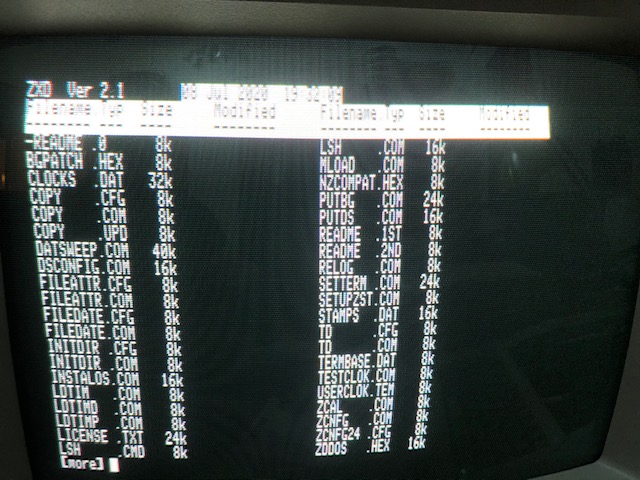
ZXD showing time/date support in a directory listing. - Let’s now load the time card driver and time command prompt automatically by default.
- In A0, type ‘SALIAS STARTZCM’
- Add ‘A1:LDTIM’ to the second line of the text file. Then add ‘A1:LSH’ to the third line. This will cause NZ-COM to automatically load both files at start-up.
- Type ‘NZCPM’ to go back to CP/M, then ‘NZCOM’ to restart NZCOM and you should see everything loaded automatically now.
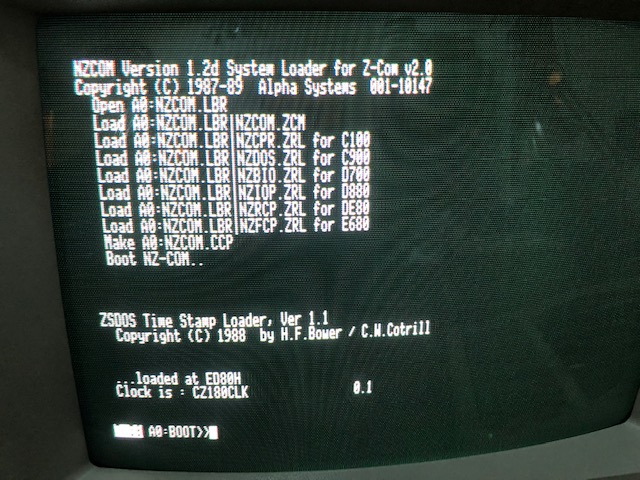
NZCOM loading with ZSDOS and clock driver support. - Congratulations! You have successfully installed NZCOM with ZSDOS and also added time card support! To further explore NZCOM’s features, check out the manual. This would be a good time to have another beer (and make a backup).
Within the .zip file is a fully configured NZCOM/ZSDOS/TimeMaster partition named PCPI-NZCOM.po with all of the above steps completed if you don’t feel like doing it the hard way. You can drop this file onto your CFFA card and have at it.
Enjoy your new tricked out CP/M system!
-ECNeilson