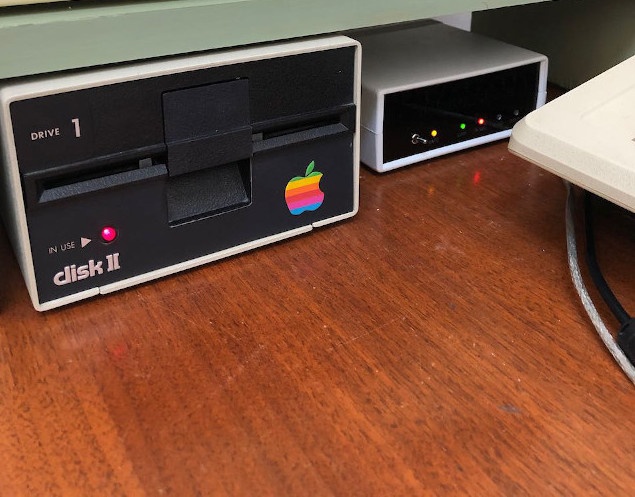
The Applesauce floppy drive controller was invented by John K. Morris. Applesauce combined with the new .woz disk image format for emulators is a major advancement in the archival of Apple II software. I have Apple floppy disks that are 40 years old now, and they are beginning to deteriorate. It’s no fun cleaning iron oxide bits out of your disk drive from a decomposed disk, let me tell you!
The Applesauce lets you copy floppy disks at the bit level by reading the actual magnetic fluxes on the disk, and also copies the disk tracks in quarter-track increments. Being able to preserve original software with all of the copy protections in place has been the gold standard for Apple II enthusiasts for years. It’s a great piece of a hardware and I couldn’t wait to get one so I could archive my personal collection.
What follows are my experiences using the Applesauce. Overall, it worked extremely well and I was able to archive most of my collection, but I did encounter some disks that were not copyable. I also discovered a few issues with emulators and the .woz format along the way.
Installation of the Applesauce
To use the Applesauce, you need the following:
- Applesauce FDC.
- Apple II-compatible disk drive.
- Sync sensor kit for each disk drive you want to use with the Applesauce (sold on the Applesauce website separately).
- A MacOS computer to run the Applesauce software.
- Philips screwdriver, small flathead screwdriver, and possibly some extra double-sided tape.
Installing the Sync Sensor
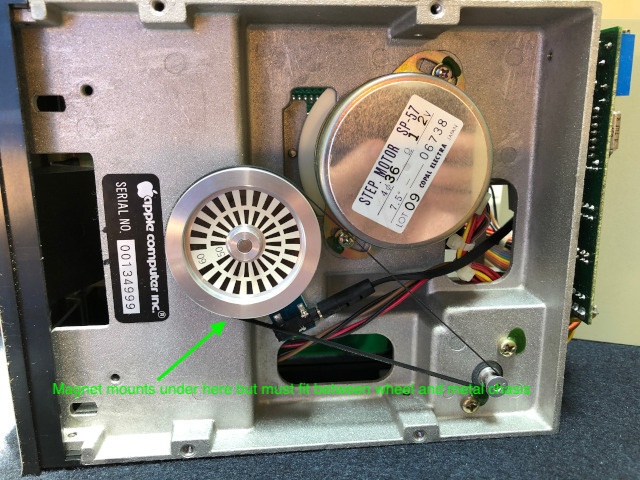
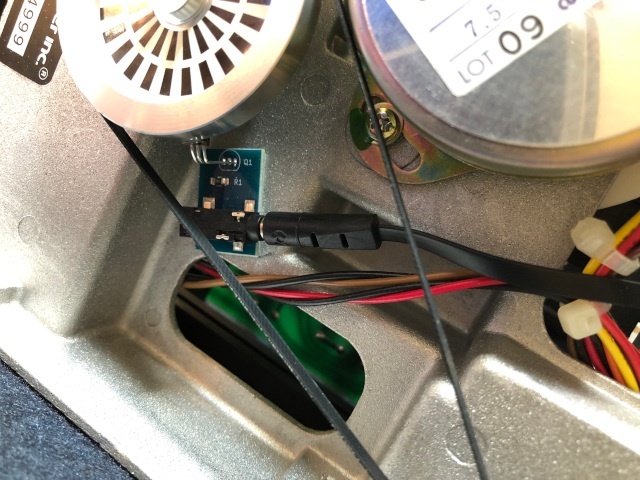
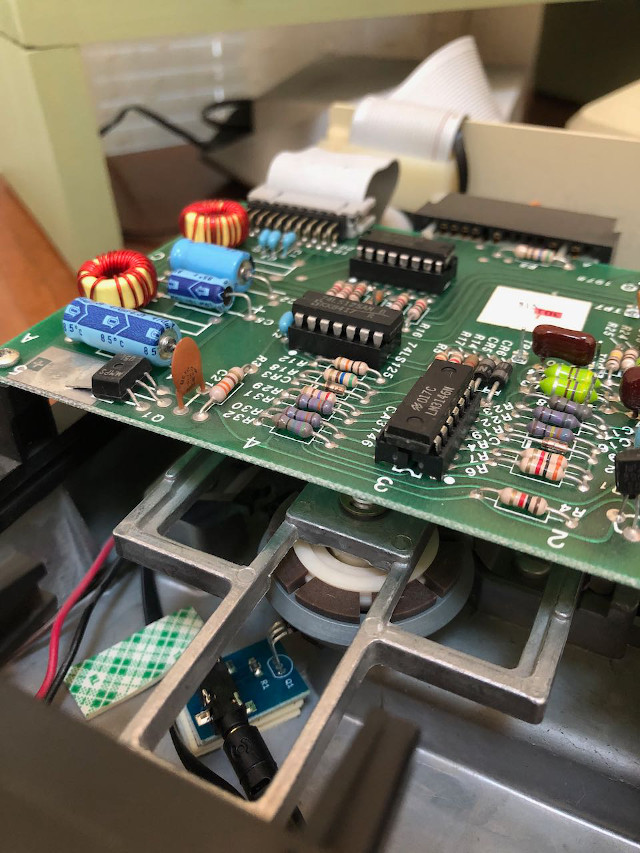
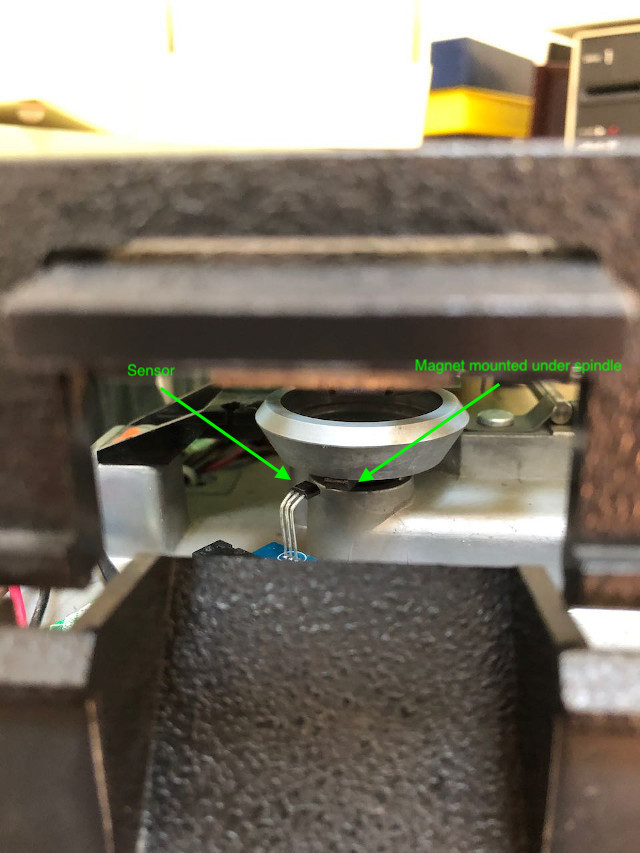
John’s website goes into pretty good detail installing the sync sensor in the disk drive. There are two ways to install the sync sensor, underside-mounted and top-mounted. Not all Apple disk drives support the underside-mount method. I tried both methods, but I prefer the top-mounted method since it will work for all drives without exception. Both mounting methods are shown below. If you choose the top-mounting method, you will need to remove the logic board of the disk drive to get to the mounting area. You also need to add one or two additional pieces of double stick tape under the sensor so it is elevated enough to be in close proximity to the magnet (see fourth photo below). The whole mounting process takes about 10 minutes and is very easy to do.
Checking Out the Drive
Before you start archiving floppies, you want to make sure your disk drive is in optimal operating condition, so don’t close up the drive just yet. John’s software will run a basic suite of disk drive diagnostics tests and also let you adjust the drive speed. The one thing it can’t do is disk drive head azimuth alignment, which requires an analog alignment diskette (pretty rare beasts). Unless your Apple drive has been having trouble reading disks recently, you probably don’t need to do a head alignment. I will write an article on drive head alignment in the future since it’s a good skill to know.
Speed Adjustment
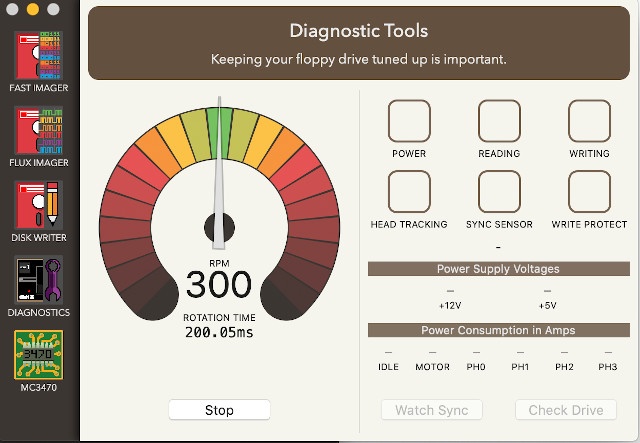
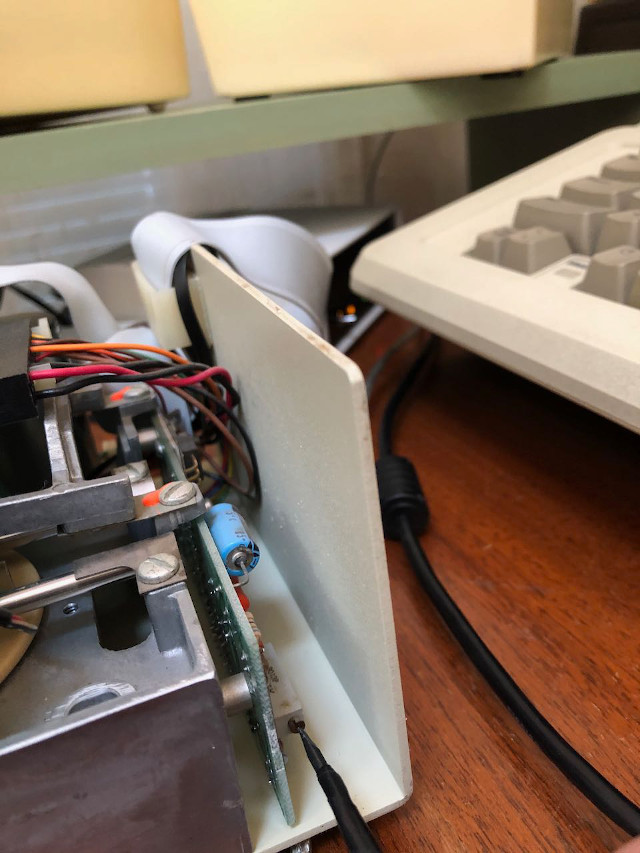
Select the Diagnostics menu item on the left and press the ‘Speed Test’ button. The sync sensor you installed allows you to adjust the drive speed without needing to have a disk inserted and is very accurate. On a standard Disk II drive, the drive speed adjustment pot is located at the back right side of the drive. You adjust the pot with a small flathead screwdriver until the speed reads 300 rpm. You can close up the drive after doing the speed adjustment.
Drive Diagnostics
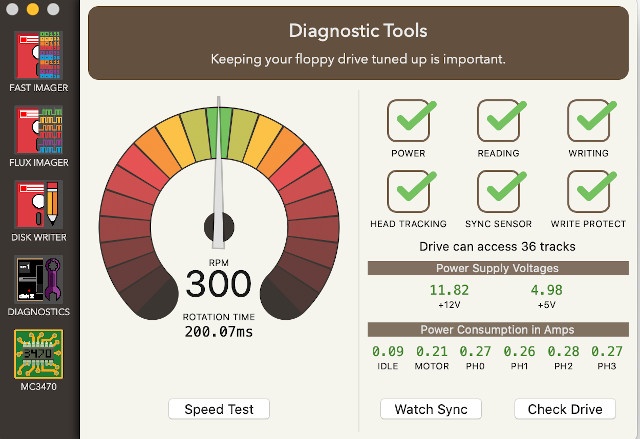
Pressing the ‘Check Drive’ button will start a series of drive diagnostics including checking drive power levels, read/write functionality, etc. You will need a scratch disk for some of these tests. I did have one drive read high on the motor power consumption amperage and it turned out to not be a reliable imager of disk images. It might have had some mechanical issues as well, but if any of the readings below are orange, I recommend not using that drive for imaging.
Imaging a Floppy Disk
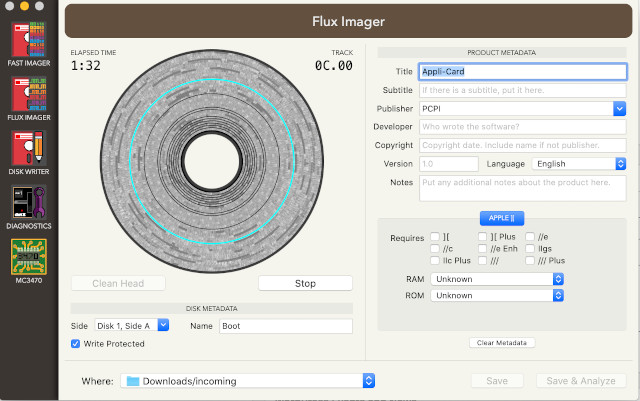
Selecting ‘Flux Imager’ from the menu lets you enter all of the details about the diskette. You then press ‘Image Disk’ and off you go. Once the imaging completes, you select ‘Save and Analyze’ to save the .a2r file, which is basically a low-level snapshot of the fluxes on the disk. Then you will want to export the .a2r file to a .woz file for using in an Apple II emulator.
The .woz file exporter is probably Applesauce’s weakest point, but I say this after being able to successfully archive 95% of my collection with a simple click of the button. I did, however, encounter a few disks that I was not able to make bootable .woz images of. John has said that .woz imaging algorithm is still a work in progress, and the nice thing about having the .a2r snapshots is that once the .woz exporting software improves, you shouldn’t have to re-image the disks. I sent John copies of my non-working .a2r files to help and here is my list of currently un-copyable disks with Applesauce:
- Ultima IV – Program Boot Disk (Update 12/2022: Successfully analyzed/exported with 1.80 release)
- The Sensible Speller
- Gumball
- Flight Simulator II (Update 12/2022: Successfully analyzed/exported with 1.80 release)
Virtual ][ and .Woz Files
In the process of imaging and checking my software, I discovered an issue with the Virtual ][ emulator and Pascal-formatted disks. It turns out Virtual ][ was not able to read .woz-formatted disk images if that disk image was in the Apple Pascal format. So most of the Wizardry games would not boot, and also the Apple Pascal programming disks. Thankfully, Gerard is always on top of things, and he just released v10.0 of Virtual ][ which fixes the Pascal issue.
Final Thoughts and My .Woz Software Archive Online
The AppleSauce is simply an outstanding piece of hardware for the Apple II. I now want to go buy more Apple II software on eBay just to be able to archive them! John has a few left in stock, so go buy one yourself.
And lastly, my .woz archive has been uploaded to the Internet Archive. It’s not as big as Antoine Vignau’s or that woz-a-day guy’s, but there were a few unique titles I haven’t seen elsewhere, so enjoy!
