
Background:
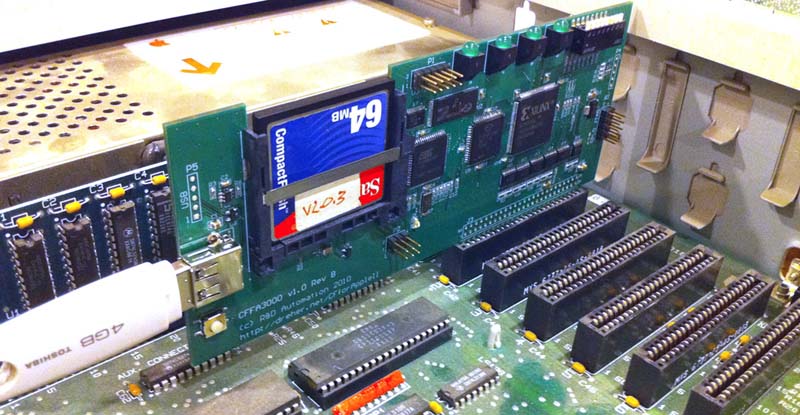
The CFFA 3000 was developed by Richard Dreher and is an absolutely fantastic piece of hardware. It acts as a hard drive for the Apple II and uses either a CompactFlash card or USB flash drive to store the ProDOS partitions. Partitions are easily created using CiderPress or other means and then transferred to the flash card where they boot like a normal ProDOS hard drive partition. But what about CP/M operating systems? Can a CP/M operating system be made to boot from the CFFA? The answer is yes if you encapsulate the CP/M system inside of a ProDOS partition. Thankfully Steven Hirsch of Applicard fame did just this many years ago and his guides on creating a bootable CP/M hard drive partition along with a Z system, like NZ-COM, work fine with the CFFA with only a few alterations.
The following procedure works for Apple II computers that have a PCPI Applicard/Starcard.
1. Instructions for Creating Your Own Dual ProDOS & CP/M Partition for the PCPI Applicard (Easy Method)
Included here are two complete Z systems ProDOS partition files for the CFFA 3000 I built a few years ago. If you really want to have some fun, I recommend rolling your own partition from scratch (see #2 below).
– zcpr32mb.po: a 32MB ZCPR3 system with 4 logical hard drives (A-D) and 2 5.25″ floppy drives (E-F)
– nzcm32mb.po: a 32 MB NZCOM/ZSDOS system with 4 logical hard drives (A-D) and 2 floppies (E-F) and also including Timemaster clock card support.
The ready-made partitions that boot into ProDOS and then allow you to boot into NZ-COM or ZCPR3 are located here. Just copy the .po file over to your CFFA card and enable it in the CFFA menu settings. After booting into ProDOS, type -PCPIBOOT and CP/M will boot. If you are prompted to enter a suffix number, select ‘2’. For the nzcm32mb.po image, I byte-hacked the PCPIBOOT binary to automatically select 2.
Partition Notes: Type PWD to see a list of all the directories available. Most of the popular file archiving utilities, assembly language compilers, some games, etc. are already on the partition. Don’t forget to look at higher user numbers like A15: (type, ‘A15:’).
2. Instructions for Creating Your Own Dual ProDOS & CP/M Partition from Scratch for the PCPI Applicard:
I’ve taken Steven Hirsch’s original instructions and consolidated them into a single step-by-step guide while adding a few updates for the CFFA3000. Credit goes to Steven for the bulk of this guide.
A. Creating the ProDOS Partition
We are going to create a 32MB ProDOS HD partition that has 16 MB dedicated to ProDOS and 16 MB for CP/M. The Apple will always boot into the ProDOS partition, then you will be able to launch the CP/M partition by typing -PCPIBOOT at the ProDOS prompt.
What you Need
- Apple II computer (real one)
- PCPI Applicard or Starcard
- CFFA 3000 CompactFlash HD for the Apple II.
- Ability to transfer disk images to your Apple using ADTPro or something similar.
- CiderPress by Andy McFadden, which runs on Windows.
- Apple II emulator like AppleWin or Virtual ][
- The drivers and OS components which I’ve consolidated into this .zip file in .dsk image format.
Creating the Starting ProDOS Partition (using a PC)
- First thing is to make an empty fully bootable 32 MB ProDOS partition using CiderPress You must make the partition 65534 blocks in size, not 65535, otherwise, ProPart (the disk partitioning software) will think there is no room left to make it’s partition adjustments due to numeric underflow in the code.
- I named my partition PCPICPM.po.
- Now format your ProDOS partition in an Apple II emulator using Copy II Plus. I configured Virtual ][ for Mac for two floppy drives and two OmniDisk drives. OmniDisks support 32MB HD .po image by adding a virtual OmniDisk card to Slot 7 in the emulator. Boot a Copy II Plus .dsk image is Slot 6, Drive 1, then format the 32 MB partition in Slot 7, Drive 1 in ProDOS format. Eject the partition.
- Using CiderPress, load your newly formatted partition with your favorite ProDOS version (minimum supported version is 1.4). For this partition, I went with the new ProDOS 2.42 written by John Brooks and released in 2016. John’s ProDOS adds a number of bug fixes and updates to the last officially released version of ProDOS in 1993 by Apple.
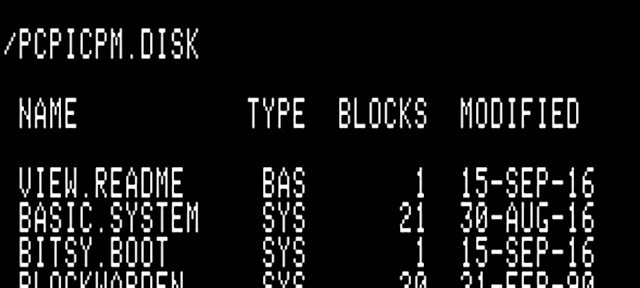
- In ProDOS, the order of the .SYSTEM files matter. ProDOS will execute the first .SYSTEM file that is coded as a SYS file it sees on the disk. I like to boot into the ProDOS Basic prompt, so I have BASIC.SYSTEM first in my CiderPress image.
- If you want to boot the BitsyBoot menu system first, it should be the first .SYSTEM file on the disk.
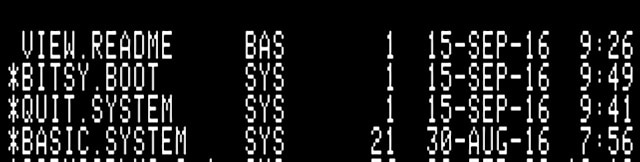
- CiderPress lists file alphabetically by default, so to get the load order correct, you need to add each file one at a time. The two screen shots below show the order for each variant (Basic Prompt first or BitsyBoot menu first). Note: In ProDOS 2.42, BitsyBoot replaces the ProDOS selector menu and only supports 40-columns.
- Using CiderPress, also add Copy II Plus and ADTPro to your partition. John’s ProDOS .dsk image has a single-file binary of C2P. You can always add more software later, but I use these two apps a lot for transferring files, formatting disks, etc.
- You can do a quick sanity check on the newly loaded partition in an emulator to make sure everything boots as it should (you are still in ProDOS at this point).
- If all looks good, transfer the 32MB HD image over to the CFFA and configure the CFFA to use this image (Hold M key down during Apple II boot to get to the CFFA menu that lets you select your HD image on the CF card through the SmartPort Assignment menu).
B. Creating the Floppy Disk Images to Configure the HD Partition and Adding CP/M
Next, you need to transfer the three .dsk images: propart_cpm.dsk, cpmhd1_cpm.dsk, and pcpi_dos.po from the .zip file above to Apple II floppies using ADTPro or something similar. There is a fourth CP/M .dsk image in the .zip file named pcpi_clks.dsk. You only need this disk image if you want to install clock driver support for a no-slot clock or serial port clock in CP/M. I’m going to install a driver for my Timemaster clock card, which is already included on propart.dsk. I’m also going to install additional driver support for a RAMWorks with a RAM drive. If you don’t have a clock card or RAMWorks, just skip the non-applicable steps below. Note: the other clock drivers are stored in an .LBR archive so you need NULU or something to unarchive them.
- Launch ADTPro from ProDOS and transfer the three disk images to floppies.
- Boot to your ProDOS HD image, then make sure you are in a ProDOS command prompt.
- Insert the propart_cpm disk into Drive 1 type PR#6 to boot CP/M. This is specially formatted CP/M disk with the right boot tracks to support running the ProPart program. ProPart won’t run on just any CP/M disk. There are also some corrupt versions of ProPart floating around so make sure you are using this disk image or ProPart will hang when you attempt to run it. This is what you should see in the floppy disk’s directory:
- Type ‘PART.COM’ to launch ProPart.
- Select the defaults (Slot 7, Drive 1) and you should be immediately taken to the to the next screen. If not, check to make sure your partition size is 65534 blocks and that you are booted directly from the propart_cpm.dsk image.
- Choose 1 for visible ProDOS image. Choosing option number one (Install Partition w/ Visible Method) will initiate a scan of the disk’s current usage; this may take a few moments on a large drive. A screen will then appear giving the slot, drive, and volume name of the selected drive. The total storage size of the disk, highest block in use by ProDOS, and total space available for CP/M are displayed also.
- Select ‘Y’ to advance to the partition setup menu.
- We are going to create two 8 MB logical drives so clear the field with ‘Ctrl-Y’ and enter ‘16000’ for total amount of space and ‘2’ for total number of logical drives. This will leave 16 MB for ProDOS stuff. If you want to change any of the defaults, use ‘Ctrl-Y’ to clear the field.
- Press ‘Enter’ to cycle through the default logical drive values.
- The program does not allow backing up to an incorrect entry. If you make a mistake, step through the defaults with a series of carriage-returns until the Would you like to modify the partitioning?” prompt appears. At this point a ‘Y’ answer returns you to the first prompt for another try.
- When you are ready to proceed to the next step, Select ‘N’ at the modify partition prompt.
- At the “Install CP/M on disk” prompt, select ‘Y’ when you are ready to actually write to the HD partition. Selecting ‘N’ starts you over.
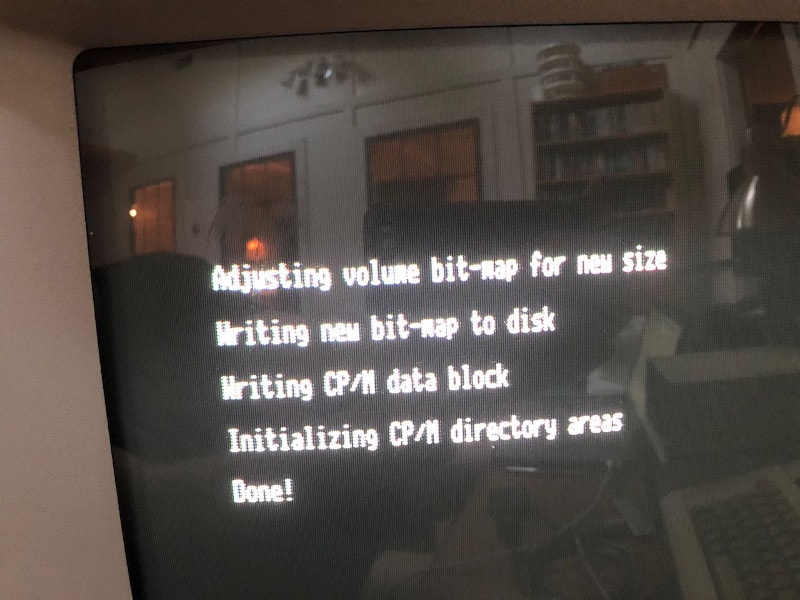
- After successfully writing to the hard disk, the menu will change to displaying information about your new CP/M partition. The next step is configuring the device drivers…
- The ProPart program should now show a different menu saying “Partition is currently visible to ProDOS”. If you quit the program at this time, when it relaunches and detects the new CP/M partition, it will return to this menu.
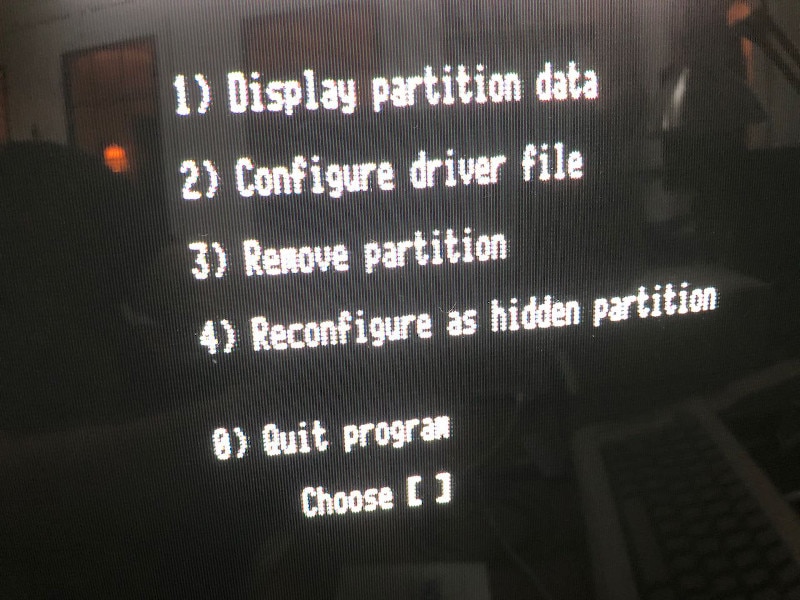
- Quit the program now.
- Insert the CPMHD_cpm disk in Drive A now and press ‘Ctrl-C’ to reload the drive.
- We are going to load the following drivers in exactly this order:
- FAST2E80 (if you have an Enhanced IIe only)
- PDOSMLI (ProDOS MLI)
- PDOSHD (ProDOS Hard Dsk)
- DISK525 (ProDOS 5.25 Disk support)
- TMASTER (TimeMaster Clk: only if you have a TimeMaster and if you have another clock driver as mentioned above, now is the time to load it).
- RAMWRK0 (only if you have a RAMWorks card)
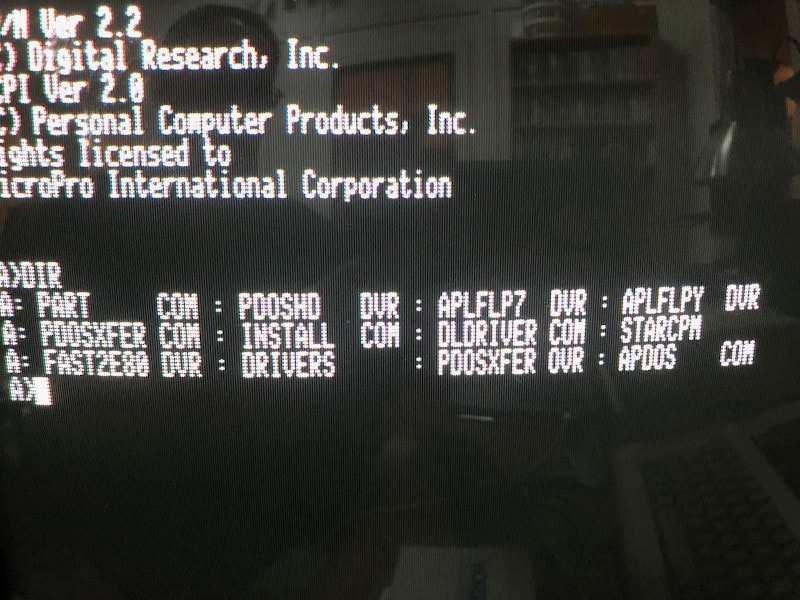
- Type ‘INSTALL’ to load the driver installer. The CPMHD_cpm disk image already has a preloaded DRIVERS file on it. If you want to see the preloaded file, select ‘A’ and then type DRIVERS. All of the pre-loaded drivers will appear like you see in the image below. You can then delete and add drivers as needed, just make sure you keep the exact order for the first 4 drivers. If you want to make modifications to the existing DRIVERS file, you have to delete it first (‘ERA DRIVERS’), then reload all of the drivers, otherwise, you will get an error when you try to save the file over the existing one. If you’re loading drivers from scratch, select ‘A’ to load a driver and type in the drivers name (ex: FAST2E80). Keep adding drivers until you are ready to go to the next step and write the drivers to the floppy disk’s boot track. In the end, your drivers file you should something like this.

- When you are ready to save, first select ‘C’ to Save Drivers file, then ‘D’ to build the CP/M boot image and write this to the boot tracks of the floppy, in this case ‘A’.
- Exit the program and restart your Apple II.
- Make sure the newly re-written CPMHD_cpm disk is in Drive A and at the Basic prompt, type ‘PR#6’.
- If everything went as planned, CP/M will boot and you will now have the following drive map:
- A: CP/M Logical Drive #1 (8MB)
- B: CP/M Logical Drive #2 (8MB)
- C: RAM drive (if you installed the RAMWRKS driver)
- E: Disk Drive 1
- F: Disk Drive 2
- Pretty awesome, eh! Now let’s make CP/M bootable directly from the CFFA3000…
D. Booting CP/M from the CFFA3000
==>Phase 1
- Restart the Apple II and insert the PCPI_dos disk in Drive 1.
- Using Copy II Plus, copy the following files from the floppy to the root partition of the HD.
- PATCHER
- LIB
- ZPATCH.1
- ZPATCH.2
- FBOOT1
- PCPIBOOT
- PCPIBOOT2
- Insert the bootable CP/M diskette with HD support you created earlier into a free floppy drive (slot 6, drive 2 is the recommended location). From the ProDOS BASIC
- prompt, run the patch program: -PATCHER
- Follow the prompts and direct the program to the proper location for the CP/M diskette. When presented with a screen of:
0) Image capture only, to suffix “.0”
1) Patched to suffix “.1”
2) Patched to suffix “.2”
3) Patched to suffix “.3”
Choose the system to be created:
- Hit ‘1’ at the prompt. The program will read the boot tracks into memory, apply some patch overlays from ‘ZPATCH.1’ and save the resulting image as ‘ZIMAGE.1’.
- When complete, exit the program by hitting, e.g. space.
- Boot the system by running the floppy startup utility: -FBOOT1
- When prompted, move the CP/M diskette that was in Slot 6, Drive 2 to S6,D1 and strike
- a key. You should see the usual ‘LOADING DRIVERS’ message followed by the CP/M prompt.
==>Phase 2:
- Change directory from your hard disk to the CP/M floppy (E: if you followed this tutorial) and run PDOSXFER. The default is CP/M (Z-System) –> ProDOS, so hit enter to proceed. You will get a read error if your floppy is set to E:, so when you see the error, select ‘E’ to exit and a valid list of drives will show on the screen. Select the E drive (or wherever you have S6, D1 mapped).
- You will see a directory listing of the CP/M diskette. Using the arrow keys, highlight ‘DRIVERS’. Enter ‘R’ for rename. An entry field will open up at the bottom of the screen. Enter ‘DRIVERS’ followed by a space to move the cursor past the ‘.’ character. Enter ‘2’ for the extension and hit enter. Now, tag the file for transfer by entering ‘B’ to move it into ProDOS as a binary file. Hit enter again, which moves you to the target selection screen. The program will try to identify all ProDOS volumes currently online.
- Use the arrow keys to select the hard drive you wish to start from. Hit enter again. Hit enter to target the root directory. If all goes well, you will see a series of ‘>>>’ characters at the bottom of the screen and the DRIVERS file will be copied to ProDOS as ‘DRIVERS.2’.
- When complete, exit the utility with ESC. Return back to ProDOS by running the QUIT.COM utility, select BASIC.SYSTEM and set your prefix back to the location where you placed the ProDOS support files and the new DRIVERS.2 file.
- Run the patcher program again, but this time select the option to read the CP/M diskette and patch to suffix ‘.2’. This will read the boot tracks of the diskette again, apply the overlays from ‘ZPATCH.2’ and save the resulting image as ‘ZIMAGE.2’. Exit the patcher and verify that both ‘ZIMAGE.2’ and ‘DRIVERS.2’ are present in the same directory as is PCPIBOOT.
- Run the PCPIBOOT program: -PCPIBOOT
- At some point during the patching process, you might see a ‘memory in use’ message that won’t let you boot into CP/M from ProDOS. If you see this, power cycle the Apple and continue on. That should fix things, and it won’t affect the final installation.
- When prompted for the suffix, enter ‘2’. CP/M and drivers should load directly from ProDOS and bring you into a working CP/M environment. From here you can use the PDOSXFER program to move files back and forth, quitting to ProDOS at any point you wish with QUIT.COM.
- I’ve also added PCPIBOOT2 which is a byte-hacked binary of PCPIBOOT that bypasses the manual selection of suffix 2 and gets you into CP/M more quickly.
- One final step: From the CPMHD_CPM disk, use PIP to copy QUIT.COM and PDOSXFER.COM to the A: hard drive: ‘PIP A:=E:QUIT.COM’, ‘PIP A:=E:PDOSXFER.COM’.
- If you’ve made it this far, congratulations! You now have ProDOS & CP/M both booting from your CFFA3000. That is quite a feat! Go have a beer. You’ve earned it.
If all of this perhaps proved a bit too daunting, there is a bare-bones HD-bootable partition that encapsulates everything done up to this step in the PCPICPM HD Bootable sub-folder of the main .zip file. Just drop it on your CFFA.
You may also want to copy over the default CP/M files and other utilities from the Applicard system disks.
In the next article, I will show how to load the NZ-COM OS on top of CP/M and get time card support working. NZ-COM is a very nice enhancement of basic CP/M.
Good luck and have fun,
ECNeilson
References:
- CFFA 3000 web site: http://dreher.net/?s=projects/CFforAppleII&c=projects/CFforAppleII/main.php
- Up and Running CP/M on the CFFA: http://applecpm.blogspot.com/2011/12/up-and-running-with-cpm-on-cffa.html
- Known locations for ZCPR3, NZ-COM and ZSDOS: