

What vintage technology site would be complete without at least one vacuum tube project!
My college engineering experience was during the 1990s and I never got the chance to learn about vacuum tubes or punch cards, or even Pascal for that matter (first years had already switched to C++). Tubes (or valves if you’re British) have been driving electronics since the early 1900s and they’re still used today for high end audio and certain RF applications. They are a wonderfully robust technology, provide unparalleled audio quality compared to most transistor-based designs and they are simply beautiful to behold.
I felt my engineering education was just not complete without some vacuum tube theory so I bought an outstanding book called simply Valve Amplifiers, 3rd Edition. Who doesn’t love to read a good technical manual. This book taught me everything I wanted to know about tube theory and basic design principals. The final sections of the book are devoted to analyzing existing tube-based designs. All in all, a lovely read. But after reading this book, I really wanted to put all of this theory into practice and build something!
Vacuum tube design can be challenging in a number of different ways compared to vintage PC projects. For one, I don’t have some of the standard tube testing equipment for testing and plotting tube characteristics. Also, tube voltages are much much higher (on the order of 100s of volts) than transitor-based circuits, making proper grounding and insulating habits essential. And there are the mechanicals. Argh! If you’ve seen my other projects, mechanicals are generally not my forte. Tube projects tend to involve sheet metal alterations and some people even build their own transformers. I really didn’t want to roll my own transformer windings so for my first project, I decided to go with a kit, and Bob Latino had just the kit for me.
Bob makes fantastic tube amplifier kits. His website has a nice selection of amps including replica kits of the original Dynaco ST-70 and ST-120 ampfliers from the late 50s and early 60s. Bob made a few minor tweaks to the original design to enhance performance but the kits are about as close as you can get to opening a vintage 1959 Dynaco ST-70 do-it-yourself kit. I decided to go with an ST-70 with the following options:
- Upgraded capacitors
- Stepped attenuator (so I wouldn’t need a pre-Amp)
- EL34 tubes (will very likely roll in some KT88’s at a later date since it’s easy to swap out tubes)
The Kit Arrives
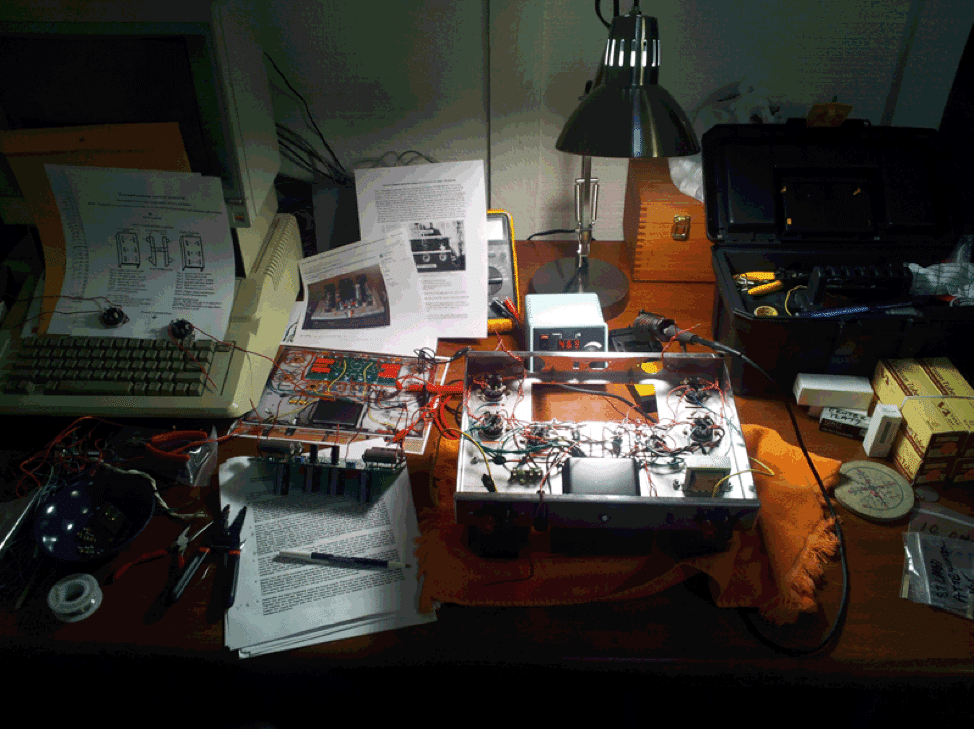
Bob was very responsive to my emailed questions about which options to choose for the amp and the kit arrived in less than a week. It was tempting to jump right in and start building an amp but Bob’s instructions had first recommended optionally painting the three industrial looking transformers with Krylon heat-resistant paint. I wanted something beautiful as well as functional so I invested the time going to the hardware store, finding some black oven paint and long-length metric screws to hold the transformers together temporarily while I spray painted them. You won’t find this length of screw at Home Depot or Loew’s. I found the screws I needed at a local hardware store called Elliot’s in Dallas (great HW store, by the way, and my usual stop now for all of my hardware-related needs). I lost a day on the build doing the transformers but this step was definitely worth the effort. The glossy black transformers look great as you’ll see below.
Bob’s insructions are outstanding. Just follow the steps, double-check your work and what looks like a rat’s nest of wiring at first slowly transforms itself into a working amplifier.
It took probably two weekends of work to get my amplifier to the bring-up and test stage. I was very fortunate. I always double-check my wiring (especially with raw AC current running through three massive transformers) so my bring-up was flawless.
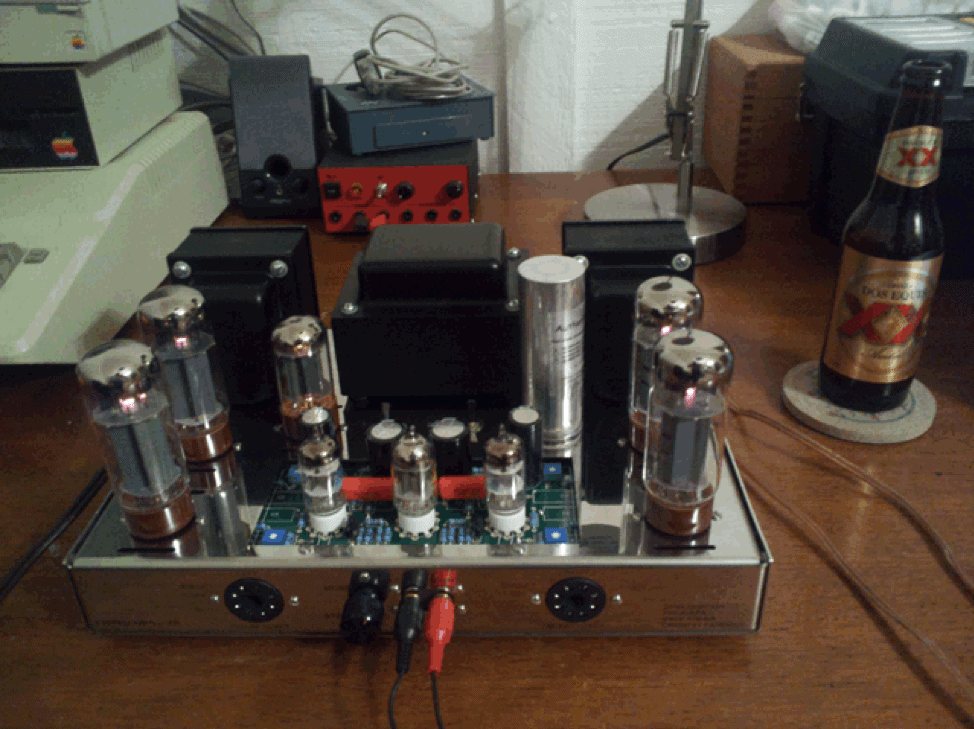
And this was the result:
Completed Dynaco ST-70
You can just see the glow of the large EL84’s. One thing to mention: The three little tubes up front are 12AT7’s and certain brands have a hidden filament that you can’t always see glow. That middle tube is an ElectroHarmonix 12AT7 and during bring-up, I thought for sure I had a bad tube until I emailed Bob about it and he quickly responded with the hidden filament details. I continued the bring-up process and everything worked beautifully.
The fact that I now know the difference between a 12AT7 and an EL84 made this project one of my favorites. I entered a whole new (old) world of electronics that didn’t involve the use of a single transistor, yet produces an audio quality that surpasses any modern transistor-based design I’ve encountered.
I still think I’m most proud of the painted transformers.
Bob’s Site in case you want to order one of your own.