
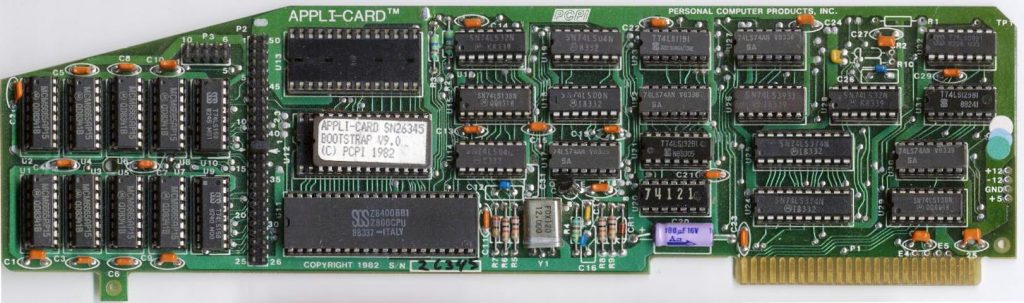
The PCPI Applicard is one of the best CP/M cards ever made for the Apple II. It contains a Z80 chip running at either 4 MHz or 6 MHz, has it’s own 64K of RAM, and supports and optional CTC timer chip. It’s one drawback is that I/O is handled through the the Apple II and this severely restricts serial port performance. While I can obtain 115k baud rates in native Apple II mode with ADTPro and my Super Serial card, you’re limited to around 2400 baud when I attempt serial transactions through the Applicard.
There was something unpure about having to reboot back into the Apple II world whenever I wanted to transfer a file over to my Applicard CP/M system so I began looking for a high speed serial port solution native to the Applicard. It turns out there was once a high speed serial port daughter card for the Applicard called the Klein SIO. Very few were ever produced but I stumbled across a very informative website by John D. Baker. John apparently reversed engineered the Klein SIO based on some of the drivers that were produced for the card originally. Based on John’s website, I was able to build my own SIO card which I’ve called the Klein/Baker SIO card. Sadly, John’s website doesn’t exist anymore but everything you need to build your own high speed serial I/O card is in this article. John’s and my cards are identical in functionality to the original Klein SIO with one exception. Our cards use a 1.84320 MHz oscillator while the original Klein SIO card used CLK/2 (3 MHz). The oscillator frequency affects the Counter Timer Chip (CTC) values that are programmed into the CTC to control baud rate. The terminal overlays provided below take this into account, but the original SIO overlays I found on the Internet assume 3 MHz. if you’re modifying your own terminal overlays, make sure to use CTC values tailored to your clock value. The CTC values listed below assume a 1.84320 MHz clock to the SIO card. Update: Another advantage of having a clock-independent oscillator on board is that baud rate settings in the CTC chip are independent of the Applicard system clock rate. This is very convenient should you decide to overclock your Applicard, something I plan to do in the future.
Schematic
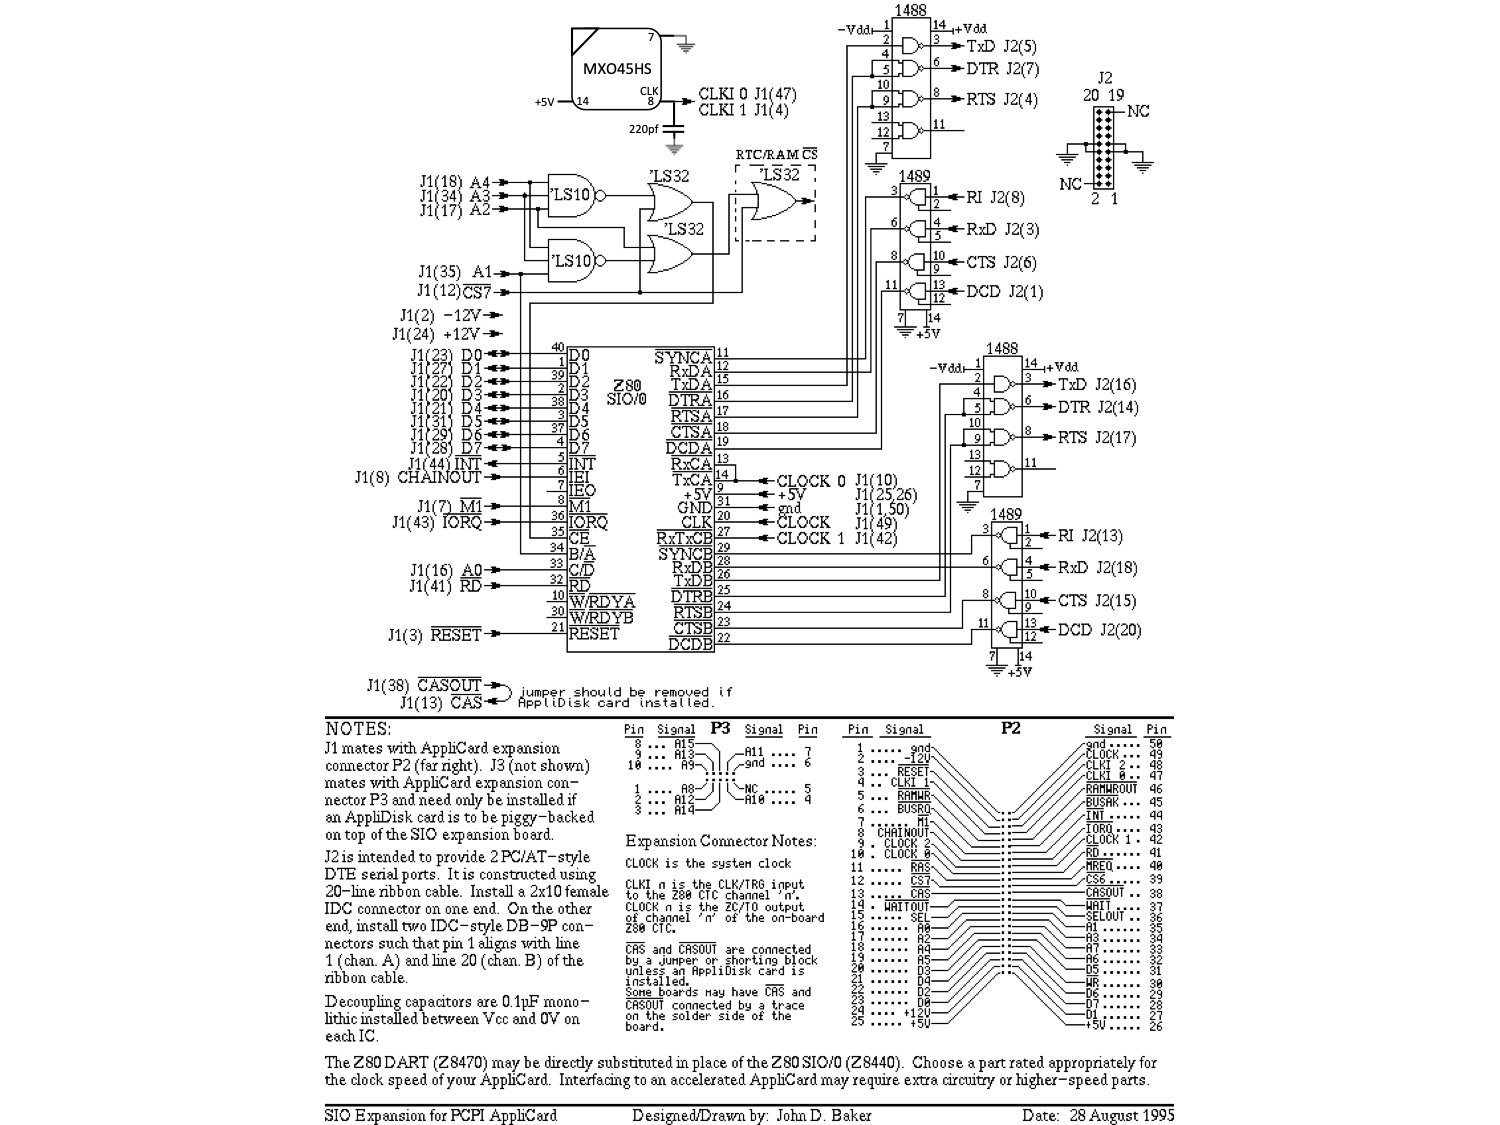
I used a different oscillator circuit from John’s, opting for a simpler canned oscillator. The reason for this is because I’ve had trouble in the past getting a clean waveform output from the 74LS04 inverter-based oscillator circuit used in John’s design. Apparently, in an inverter-based oscillator, the brand of LS04 used can affect the waveform significantly. I was not getting a clean waveform with John’s circuit, so I went with the MXO45HS. It provides a nice clock output and it simplified the design as well. Both oscillators operate at 1.84320 MHz so board compatibility is maintained. Make sure to add a 220pf or thereabouts capacitor between the CLK output of MXO oscillator and GND.
Construction

Here is the board mostly laid out. I still have the older oscillator circuit in this picture. Because my Apple IIe is chock full of cards, I didn’t have any room to mount the card as a daughter-card attachment as originally intended. I decided to attach a 50-pin ribbon cable to the Applicard and then run the cable out the back of the Apple to the SIO board. The plan was to mount the SIO in a little box and attach the box to the side of the Apple with velcro. In addition to space benefits, I get easier access to the serial ports. I’m always plugging/unplugging my serial cable as I move between this computer and others.
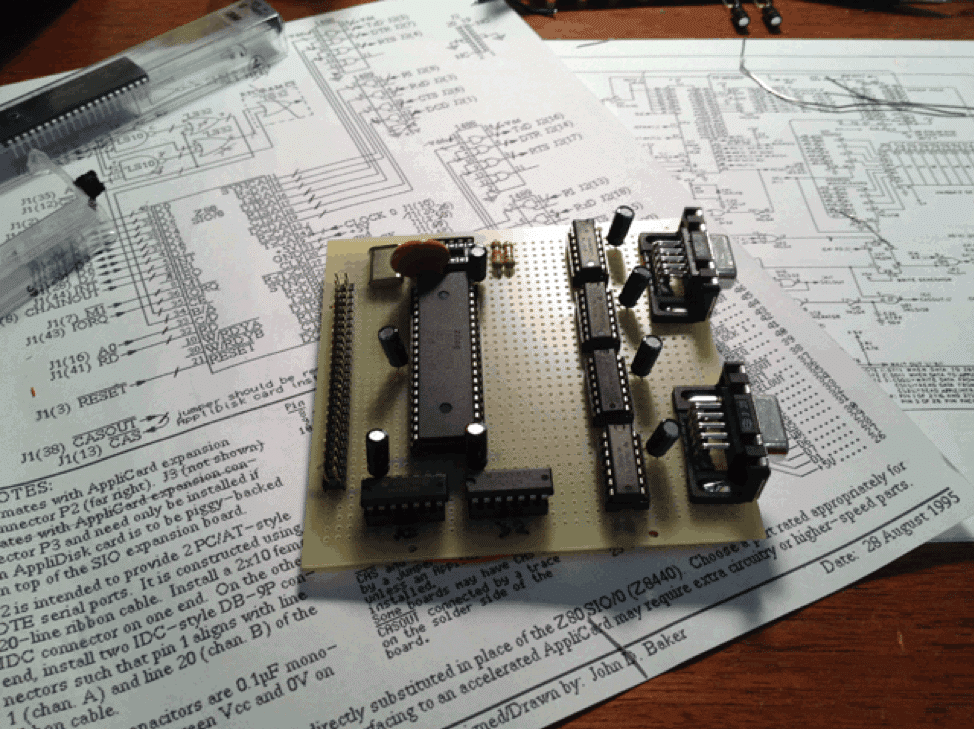
SIO Board (with old oscillator)
A close-up picture (still with old oscillator): In hindsight, I should have used male DB9-right angle connectors instead of female connectors. I’ve altered the BOM accordingly and this is the reason you see gender changers on the final unit below.
Power-up Test
Powered up and testing: This is where I learned the LS04-based oscillator was wonky. When I broke out the oscilloscope, I saw that my baud rates were out of sync due to the malformed waveform being generated. Everything else was thankfully functioning normally. I was fairly careful in the wiring and was able read/write to the SIO chip and CTC on first power-up.

Test Mounting the SIO Against the Apple IIe
Oscillator replaced and test mounting the unit against my Apple: I first purchased a black plastic box from Fry’s but the fit was not ideal. There is a marvelous electronics and surplus store in Dallas called Tanner Electronics. They are great for finding components for Vintage PC projects and always seem to have what I need. I’m always cleaning out their EEPROM boxes for one reason or another and they also happened to have had the perfect box for this project!
Testing
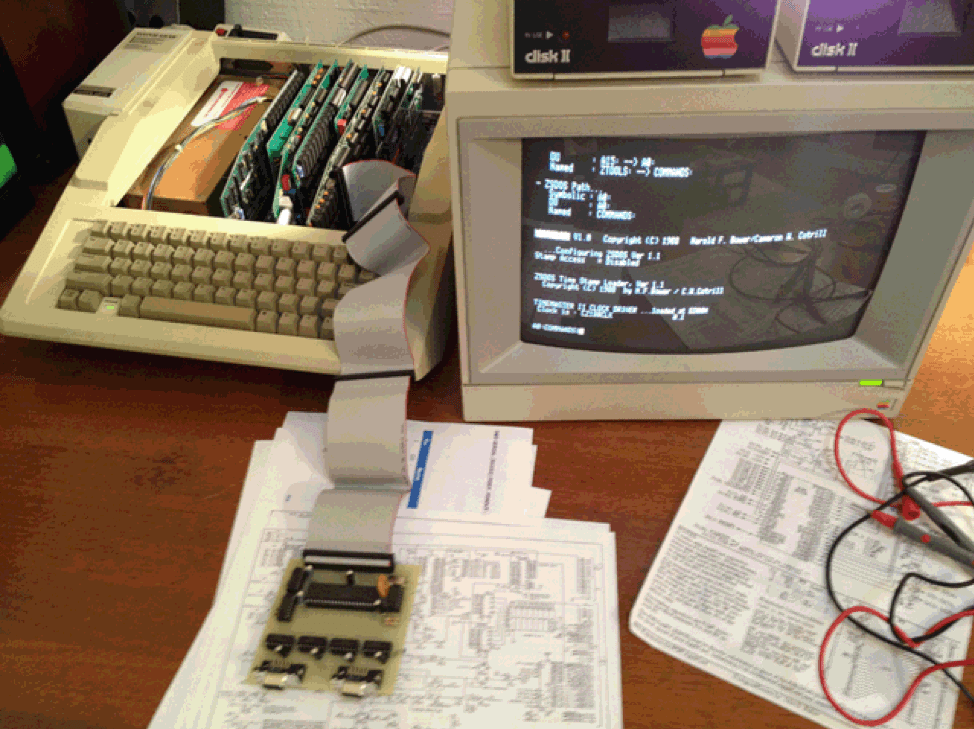
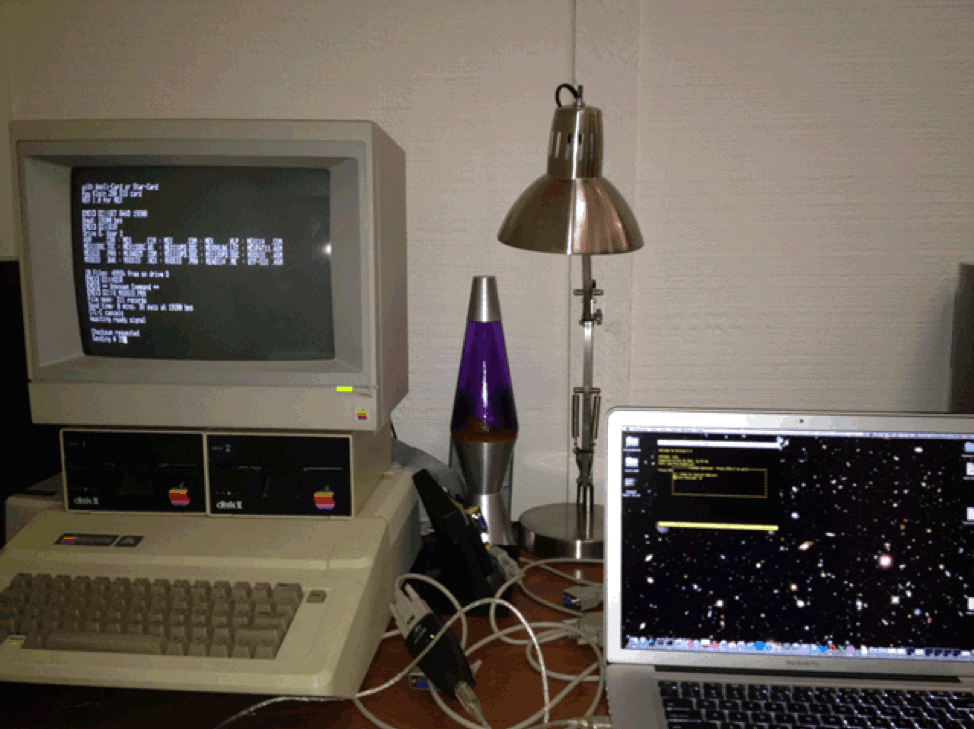
First successful file transfer at 19200 bps – woo! I thought this picture made for an interesting contrast at how PCs have changed in the last 25 years. On the left is a circa 1985 Apple. On the right is my MacBook Pro from 2011 and they can still communicate with each other, sort of like Thanksgiving when you run into that favorite great uncle who’s had an interesting life and always has a good story to share.
For the data testing, I quickly whipped up overlays for Mex, Imp and QTerm. All were capable of 19200 bps, and I was able to obtain 38400 bps with QTerm. All three terminal programs use polling for the serial I/O. QTerm is written in Z80 assembly so it’s faster than the 8080-based Imp and Mex programs. The SIO board is certainly capable of higher data rates. To achieve this, I will need to alter QTerm to do interrupt-driven I/O instead of polling. That’s the next step in this project. The QTerm source is available online and I’ve been reading up on SIO interrupt programming. QTerm is by far my favorite terminal program for CP/M not just because it’s faster than the others. It supports Kermit in addition to X-Modem and Kermit allows you to do batch file transfers. I’ve standardized on QTerm and Kermit for transferring files between all of my classic PCs. My Kaypro 4 uses the same setup. In fact, with the TurboROM upgrade and QTerm, the Kaypro 4 is easily capable of 19200 bps with no additional hardware required. See the Kaypro 4 Enhancements project for more details.
One of the neat things about this project was being able to exceed the common serial data rates of the time while still keeping with the conventional technology of the era.
Making it Pretty
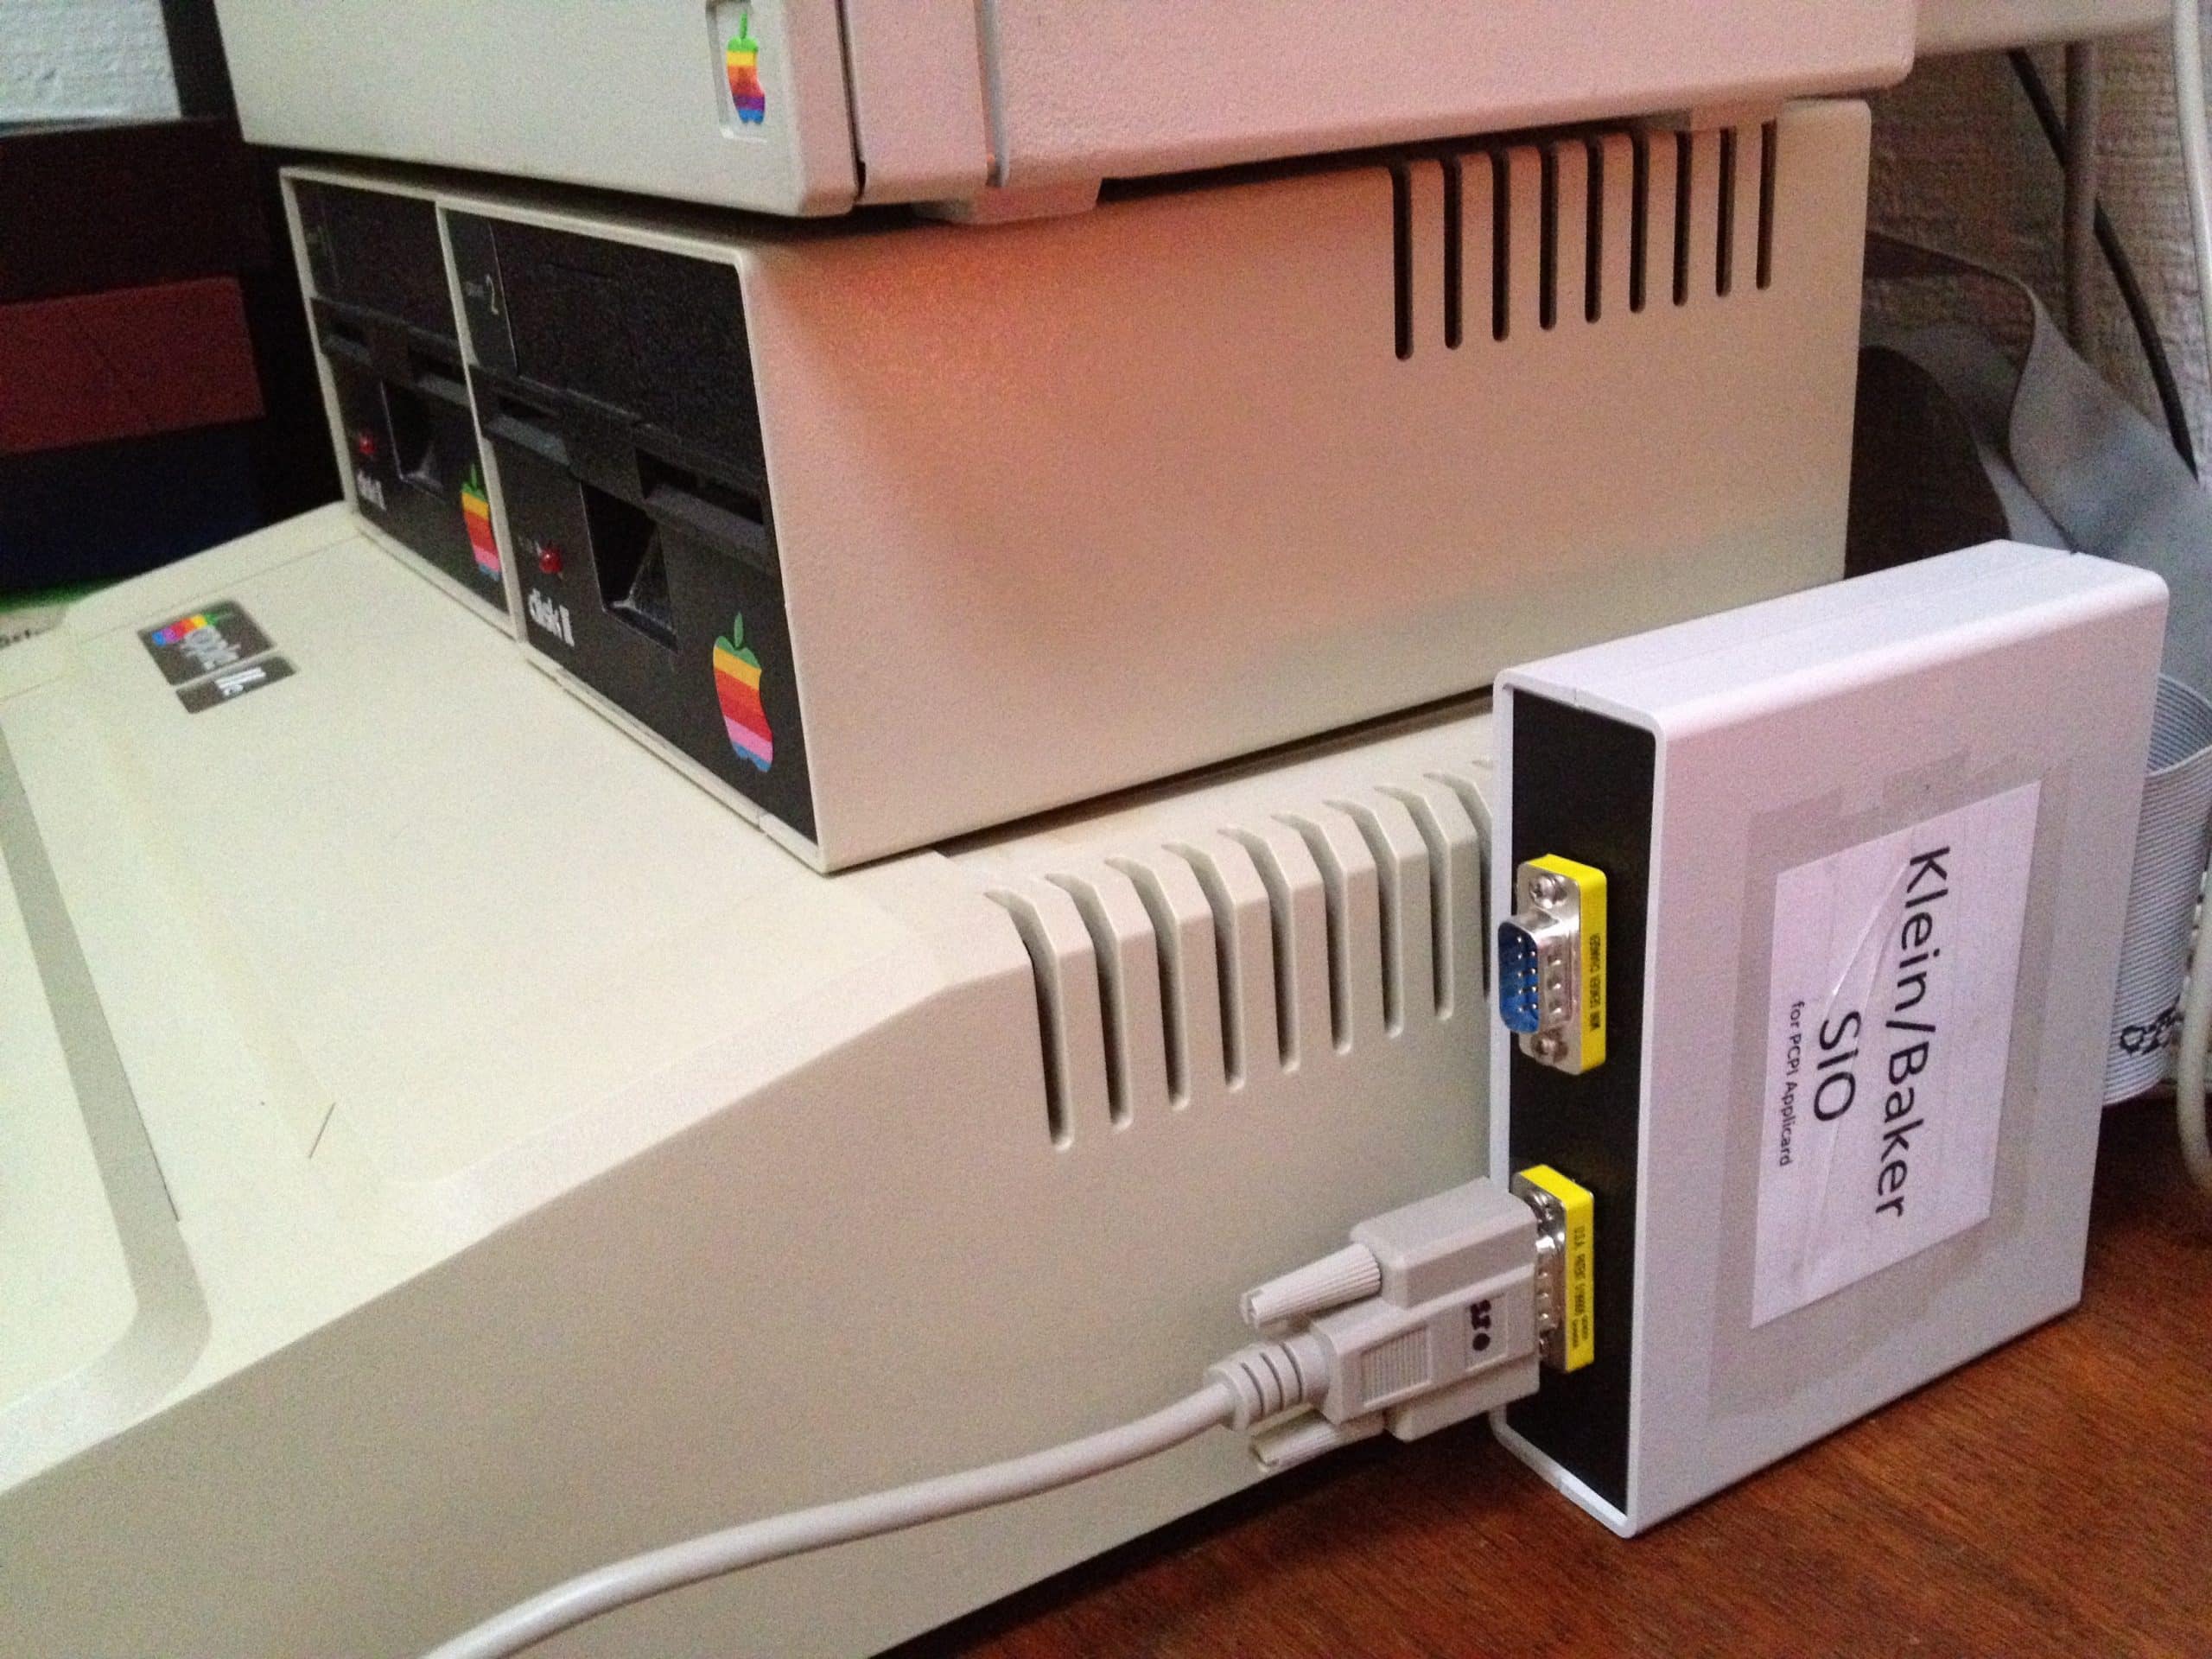
Here is the final assembled unit in its box and mounted to the side of the Apple II with velcro for easy removal if needed. I traced the serial port outlines in the black plastic front-insert of the box and then used a dremel to cut out the slots along with a slight recess in the back of the box for the ribbon cable. Serial port mounting screws are 4-40 and assuming you use the correct DB9 gender and don’t need gender changers like you see below, 1/2″ length screws should be adequate for securing the DB9 connectors into the plastic (I needed 3/4″ screws with the gender changers installed).
On the laptop side, I use the Keyspan USA-19HS USB-to-serial adapter and the Minicom terminal program. I’ve had compatibility problems with other USB-to-serial adapters but the Keyspan has never failed me. I used MacPorts to install Minicom and Kermit on my Mac.
Project Files and Configuration
The complete project including schematics, datasheets and BOM is located here. Terminal software with pre-compiled terminal applications in addition to the overlays is located here. For completeness I’ve liberally borrowed John’s SIO and CTC I/O settings from his page and posted them below. One quick note: 300 bps is not enabled in my overlays but who needs it anyways.
Address Function
——- ———————————————
80h CTC channel 0 (SIO chan. A bit rate)
81h CTC channel 1 (SIO chan. B bit rate)
82h CTC channel 2 (unused)
83h CTC channel 3 (Apple ][ Z80 mode 2 interrupt)
Programming information for the Z80 CTC can be found in the Z80 family data books.
The Z80 SIO (or DART) registers are accessed as follows:
Address Function
——- ——————————
FCh SIO channel A data register
FDh SIO channel A control register
FEh SIO channel B data register
FFh SIO channel B control register
|
Bit Rate |
CTC Time Constant (SIO in x16 mode) |
|
450 |
0 (=256) |
|
600 |
192 |
|
710 |
162 (0.16% error) |
|
900 |
128 |
|
1200 |
96 |
|
1800 |
64 |
|
2400 |
48 |
|
3600 |
32 |
|
4800 |
24 |
|
7200 |
16 |
|
9600 |
12 |
|
14400 |
8 |
|
19200 |
6 |
|
38400 |
3 |
|
57600 |
2 |
|
115200 |
1 |
Some Notes on QTerm
Some brief notes on getting the most out of QTerm:
- Ctrl-\ + ? gives you a menu of commands
- Ctrl-\ + B sets the baud rate (My precompiled version of QTerms defaults to 57600 bps)
- Ctrl-\ + R is Receive File. To do a Kermit receive, just type “KB” for best results (Kermit, Binary)
- Ctrl-\ + S is Send File. To send a Kermit file, type “KB ” or use a wildcard like *.* to send multiple files.
Getting 57600 bps out of the SIO card with QTerm
While the SIO card is perfectly capable of reaching 115k data rates, the terminal programs of the time were never designed to work beyond 2400 baud. 9600 baud modems were Ferraris in the late 80s and 38k or 56k speeds were unheard of. With a little hacking, however, it’s possible to get a bit more out of some of the terminal programs. QTERM_SIO.ZIP is a modified QTERM with stable data rates of 57600 bps using the SIO card. By inlining some of the modem I/O subroutines, I was able to decrease some of the CPU overhead. QTerm, like most CP/M terminal programs, uses patch overlays for different modem types. I basically removed the “call” overhead of the patch overlays and placed the SIO I/O routines directly into the QTerm code. That sped things up significantly.
I’m now getting very close to that holy grail of 115200 bps, although I may end up having to write my own terminal program to achieve optimum data rates.
See the README.1ST file in the .zip file for details on how to compile and run High Speed QTerm.